Transglutaminase-Innovative-Flat-Iron-Sous-Vide
Say this three times fast
Say this three times fast
What can I say I work for Government and it's all about the acronyms. If you work for the government you know what I am talking about. So with that in mind I decided to use an acronym to describe yet another innovative idea. And of course the title of this post was too big for Google.
I think this is important to point out; when you use Transglutaminase to bind proteins you're only limited to your imagination and I have been told I have a big one. The idea of using TG on Flat-Irons came to me while eating a filet and realizing once again that it's really a tasteless tender piece of meat. I love Flat-Irons so what if ? Hmmmm.... Would'nt it be nice to have the best of both worlds? With Flat-Irons and Sous-Vide you certainly can.

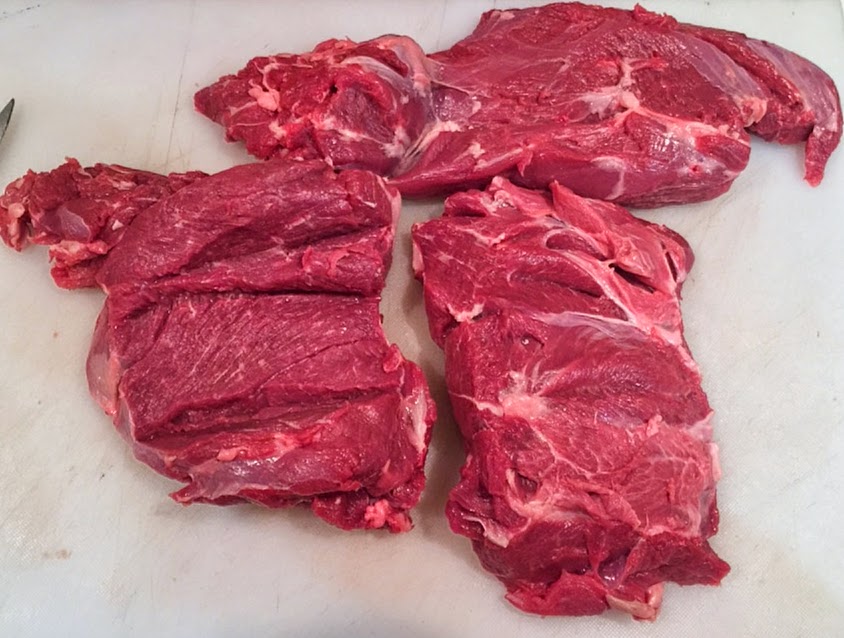
 In the recent past I experimented with TG and Flat-Iron Steaks and it came out very well so I decided to do it bigger and better. Essentially I took one very large Flat-Iron steak, cut it in half, stacked it, trimmed it and shaped it into a cylinder. It came out great and it was worth doing it again but on a much larger scale this time. Bigger is always better in my world. This time I'm gonna take three large FI-Steaks and replicate the technique.

2055 grams (4.53 lbs) of Beautiful Flat-Iron Steaks.


You first have to figure out the best way to stack the FI. The goal of course is to have the best symmetrical shape. And if they are close to the same weight and size this shouldn't be much of a problem. Sprinkle the TG thoroughly on to the FI getting it into every nook and cranny. Once you're satisfied with the coating stack them on each other and sprinkle the TG on the outside getting it everywhere. Doing this will ensure a cylinder shape that will hold.


Start rolling it up in plastic wrap. Make it sure it's very very tight. Tie off the ends and pop any air-holes that may be present.


All done. The meat will stand vertically in my refrigerator (to keep its shape) for 24 hours. 24 hours is an optimum time for the TG to bind with the meat. This creates the best bond in my opinion.
 It's been exactly 24 hours and the Flat-Irons have formed one piece of meat. I took off the plastic wrap and salted (Dry-Brine) the Flat-Irons and vacuumed sealed for another 24 hours. After the 24 hours have elapsed I may add some fresh herbs to the bag to enhance and perfume the meat. A great technique I learned from the book Under Pressure by Thomas Keller is if I am going to add herbs to the bag prior to the SV process I want to first put them in plastic wrap and not directly on the food. Putting them directly on the food will over power it.


My Review
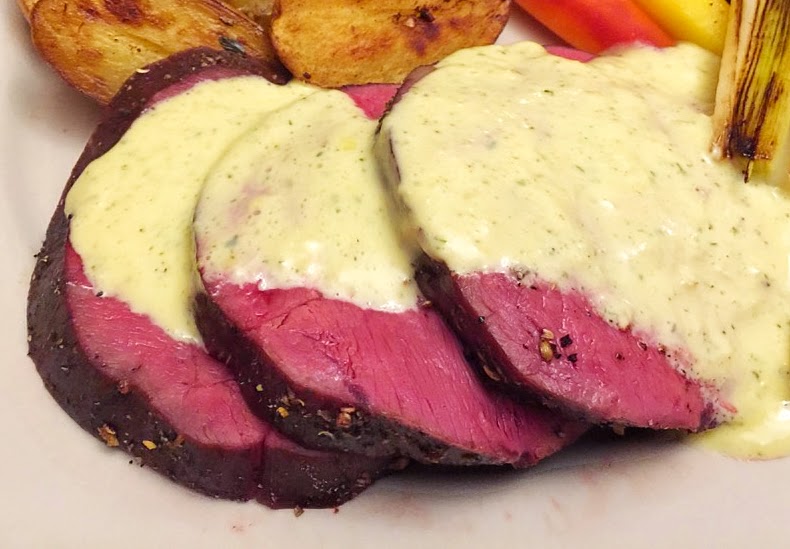
Absolutely amazing I will not change a thing.
The sauce that accompanied the meat was a Bearnaise. Simple to make just Google it.
Veggies
I cooked them at 194 degrees. I also added Fat and a little salt to the bag. I added Lemon thyme to the potatoes.
Carrots 33 minutes (served warm)
Potatoes 45 minutes (sliced in half and browned)
Leeks 8 minutes (browned in butter)
How can I be so precise with my times. I ran an experiment that morning.
TOP OF THE FLAT-IRON PAGE
After the 24 hour Dry Brine it was time for the SV. The thermal Jacuzzi was set at 133 degrees. I cooked the FI's for 9 hours which also coincided with the pasteurization time. After the cook I shocked the meat in an ice-bath for several hours to rapidly bring down temp. I refrigerated the meat overnight. This was not needed but I work for a living and sometimes our schedules interfere with our hobbies.
This is a picture of what the meat looks like after I re-Submerged the meat into the SV to bring the temp up. Note: I did not want to serve cold meat so I had to warm it up prior to the next step. What better place then the SV to warm up the meat.
This is a picture of everything that I was going to serve for dinner. BTW- I learned how to cook these veggies on Chefsteps.com. This is a great site for everyone to learn from. More on this later.
After the meat rose to an appropriate temp I took it out of the vacuumed sealed bags, dried off the meat thoroughly and coated it with my favorite rub for this application. I like using 1 part Peppercorns, 1 part Grains of Paradise and 1 part coriander. I sprayed the meat down with Canola oil so the rub would adhere. Note: I did not add salt because of the previous dry brine.
I tossed meat into a 500 degree oven for 9 minutes. That's it!! Nothing more to do.
See Review at the botom.
My Review
Absolutely amazing I will not change a thing.
The sauce that accompanied the meat was a Bearnaise. Simple to make just Google it.
Veggies
I cooked them at 194 degrees. I also added Fat and a little salt to the bag. I added Lemon thyme to the potatoes.
Carrots 33 minutes (served warm)
Potatoes 45 minutes (sliced in half and browned)
Leeks 8 minutes (browned in butter)
How can I be so precise with my times. I ran an experiment that morning.
TOP OF THE FLAT-IRON PAGE